Chromatic Aberration in After Effects & Free Shortcut
Building a chromatic aberration After Effects composition—often searched as chromatic abberation After Effects—usually requires stacking duplicate precomps and manually shifting RGB color channels. If you want authentic lens dispersion without waiting on desktop render queues, you can dial in chromatic fringing directly inside your browser. The free Glitchest app processes video and image files locally on your machine, requiring no account and no media uploads.
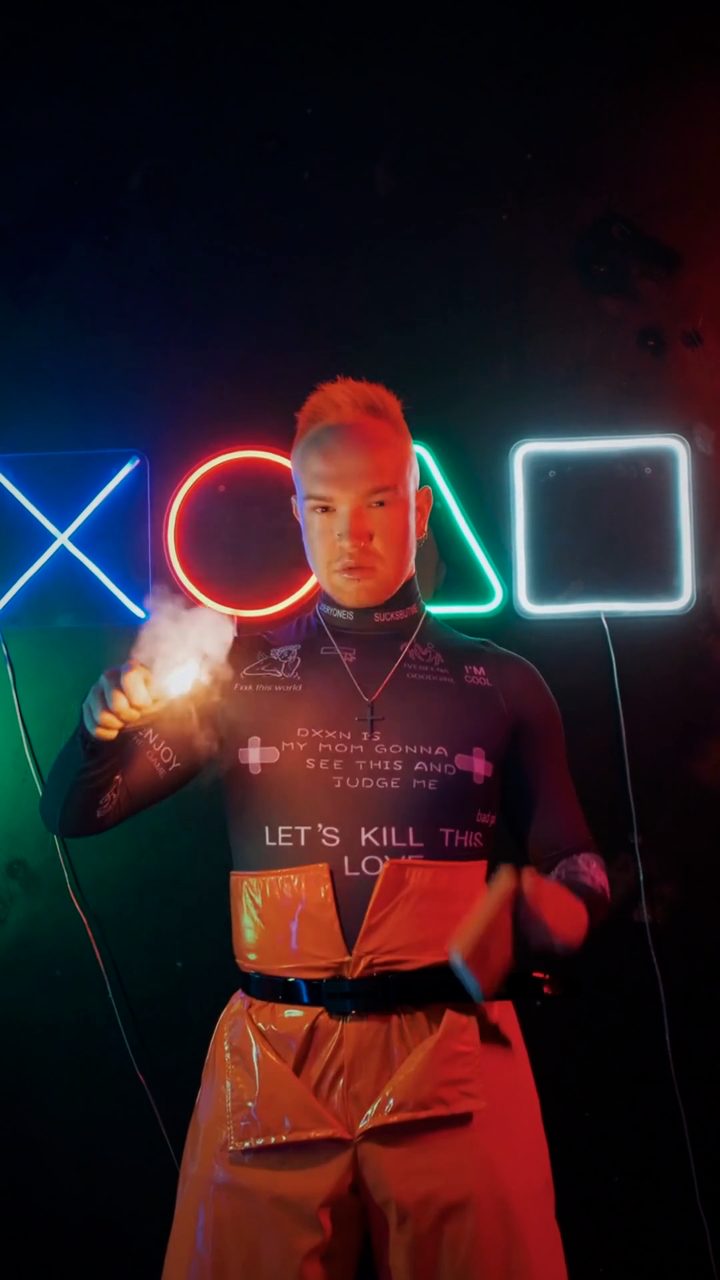 BEFORE
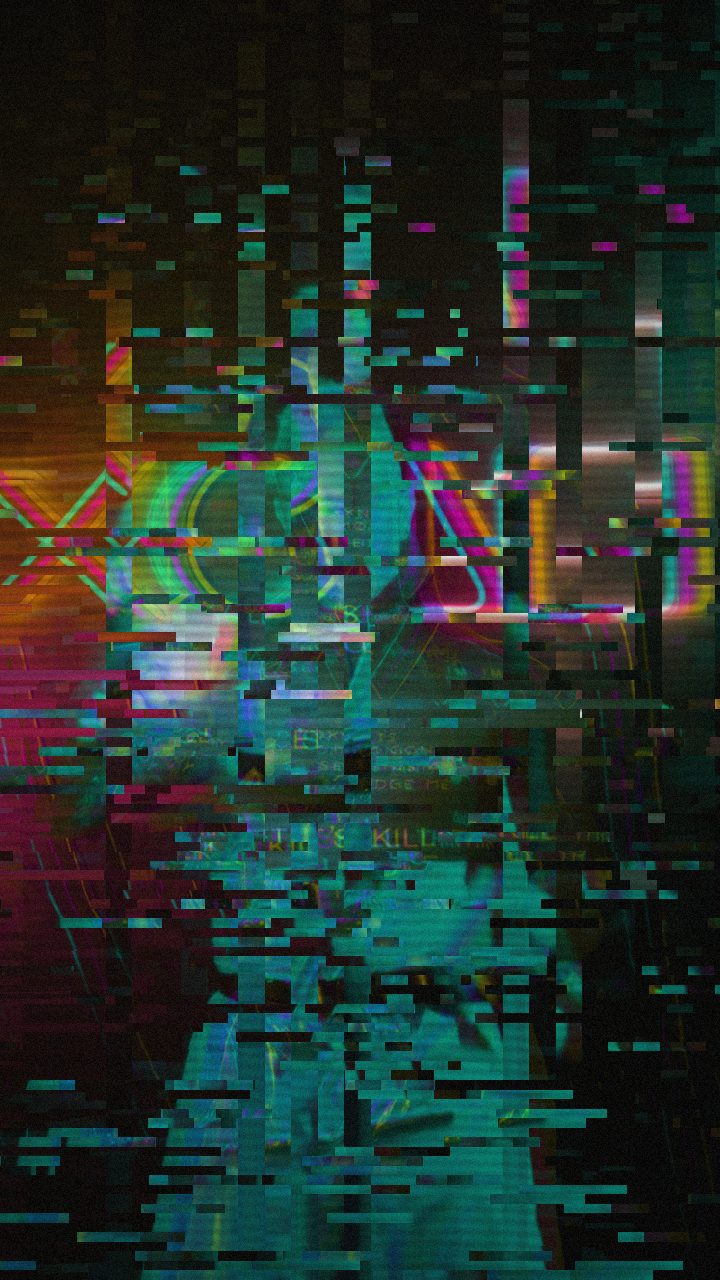 AFTER
AFTERThe Native After Effects Workflow: Channel Splitting
In Adobe After Effects, creating a customized chromatic aberration effect is an established technique that offers deep compositing control. The standard native workflow relies on separating color channels across multiple duplicate layers:
- Duplicate Your Footage: Import your clip into a new composition and duplicate the layer twice so that you have three identical stacked layers (named Red, Green, and Blue).
- Isolate Channels: Apply the Shift Channels effect to each layer. On the top layer, set 'Take Red From' to Red, while turning Green and Blue to 'Off'. On the second layer, isolate Green only. On the third layer, isolate Blue only.
- Set Blending Modes: Change the blending mode of the top two layers to Screen (or Add). When aligned perfectly, the composite reconstructs full white and normal colors.
- Offset and Scale: Slightly nudge the Position or Scale of the Red and Blue layers by a few pixels, or apply an effect like Optics Compensation (with 'Reverse Lens Distortion' checked) to individual channels to bend the color fringes outward toward the corners of the frame.
While this technique yields great precision, setting up pre-compositions, channel assignments, and expression controls for every asset takes time. If you need a fast render for social content, album artwork, or rapid prototyping, jumping into a full desktop compositor can slow down your creative momentum.
The Browser-Based Shortcut: Instant Glitch Optics
For quick turnaround edits without software installation or account creation, Glitchest provides an instant, WebCodecs-accelerated alternative. Instead of manually routing color channels across separate layers, you can load your media directly into the editor and manipulate real-time channel offsets in seconds.
Starting with the Cyber Glitch Preset
When opening the editor, select the Cyber Glitch preset. This preset is designed specifically for aggressive digital signal breakup and high-impact color misalignment, making it the ideal foundation for chromatic aberration.
Once selected, you can fine-tune the look to match the exact intensity you need:
- RGB Split: This is the primary driver of your chromatic aberration. Lower it for a subtle photographic lens fringe or push it higher to cast wide, dramatic cyan-red halos across edges.
- Hue Shift: Adjust this control to alter the rotational phase of the separated channels, transitioning your fringing from traditional red-cyan separation into electric violet, neon green, or amber tones.
- Glitch Width & Chaos: If you want purely optical lens dispersion, keep these knobs dialed down. If you want digitized signal interference layered over your color split, nudge them upward to fracture the edges into horizontal slices.
- Scanlines & Noise: Add subtle raster texture to emulate an illuminated monitor glass or retro HUD display.
Step-by-Step: Adding Chromatic Aberration in Glitchest
- Load Your Media: Drag and drop your video or still image into the browser window. Processing runs locally on your machine with zero server uploads.
- Select Cyber Glitch: Click the Cyber Glitch preset to immediately apply base color separation.
- Refine Channel Displacement: Nudge the RGB Split and Hue Shift knobs until the color displacement matches your clip's contrast profile.
- Arrange Timeline Effect Boxes: Rather than drawing complex automation curves, Glitchest uses an intuitive effect-box timeline. Drop an effect box over the duration of your clip. For an abrupt chromatic glitch on a beat drop or transition, place a short effect box directly over the cut. Adjust the box's fade-in and fade-out handles to create a smooth optical bloom.
- Layer Across Lanes: Stack multiple boxes across timeline lanes to combine a gentle base chromatic fringe with intense, momentary bursts of interference.
- Export Your Result: Click to export your final video as an MP4 via hardware-accelerated WebCodecs, or capture high-resolution PNG stills instantly using the Save Frame tool.
Targeted Fringing with Shapes and Masks
You do not always need chromatic aberration across the entire canvas. To simulate real-world optical glass—where the center remains sharp while the perimeter distorts—use the built-in ellipse mask to isolate the aberration to the frame edges. For stylized interface glitches or targeted text accents, switch to a rectangle mask to lock the effect over a specific lower third or focal subject. For deeper channel-shifting techniques and design applications, explore our guide on the online RGB split channel shift editor.
Simplifying Chromatic Aberration: After Effects vs. Glitchest
In standard After Effects workflows, generating RGB channel split requires stacking three instances of your footage, applying the Shift Channels effect to isolate Red, Green, and Blue channels, setting layer blend modes to Screen or Add, and adjusting the transform properties of individual layers. While effective, this structure bloats your composition tree and slows preview rendering on high-resolution video.
You can bypass layer splitting entirely by opening Glitchest in your web browser. Instead of managing multiple channels, the editor calculates optical dispersion client-side right on your GPU, meaning your source files never leave your device.
- Quick presets: Click preset chips like Cyber Glitch to load instant channel separation across your footage.
- Precise 0-100 knobs: Adjust horizontal and vertical shift intensity using real-time sliders to calibrate subtle glass fringing or extreme prism distortion.
- Timeline control: Trim effect boxes on the timeline and drag fade handles to smoothly transition chromatic aberrations in and out.
Once you dial in the look, click Save Frame (PNG) for single images or hit Export (MP4) to render your final glitch animation directly from your browser.
Bypassing the Chromatic Aberration After Effects Workflow in Glitchest
In standard After Effects workflows, generating chromatic aberration means applying the Shift Channels effect across three duplicate layers, setting blend modes to Screen, and nudging transform coordinates. Recreating or adjusting that look across several clips quickly clutters your timeline and slows down RAM previews. Glitchest streamlines this entire pipeline into real-time GPU processing right in your web browser.
To dial in clean optical dispersion without opening After Effects:
- Open Glitchest and load your image or video—everything runs locally in-browser, so nothing ever uploads to a remote server.
- Click the preset chips to audition immediate RGB splits, or attach the chromatic aberration effect directly to the timeline.
- Adjust the 0–100 knobs to dial in the exact channel spread, offset direction, and fringing intensity.
- Use the timeline effect boxes with fade handles to smoothly feather the aberration at the start and end of your footage.
Once you are happy with the visual distortion, grab a static image using Save Frame (PNG) or generate your finished clip with Export (MP4). You achieve the visual impact of an After Effects channel shift in seconds without launching heavy desktop software.
The exact settings
Start from the Cyber Glitch preset, then set:
| Strength (master) | 52 |
| Glitch Rate | 42 |
| Glitch Width | 48 |
| Block Size | 40 |
| Chaos | 42 |
| Datamosh (trail) | 16 |
| Horizontal Wave | 26 |
| Vertical Wave | 14 |
| Vertical Shift | 30 |
| Vertical Shake | 12 |
| RGB Split | 72 |
| Hue Shift | 48 |
| Noise | 20 |
| Scanlines | 30 |
| Flicker | 14 |
Everything else stays at its default — tweak it, then copy your own look as JSON or a link from inside the editor to share it.
Try it now — add this look to your own clip, free and in your browser.
Open the editor →FAQ
How do you create chromatic aberration in After Effects natively?
You duplicate your clip across three layers, apply the Shift Channels effect to isolate Red, Green, and Blue individually, set the blend modes to Screen or Add, and offset each layer position or scale.
Why use the Cyber Glitch preset in Glitchest instead of manual channel splitting?
The Cyber Glitch preset immediately engages responsive RGB channel displacement and digital jitter out of the box, allowing you to dial in optical fringing instantly with intuitive slider adjustments.
Can I animate chromatic aberration hits without drawing keyframe curves?
Yes, in Glitchest you simply drop a short effect box onto the timeline for an instant impact hit or adjust its fade handles to smoothly feather the aberration in and out.
What is chromatic aberration in After Effects?
Chromatic aberration in After Effects is a stylized visual effect that mimics optical lens distortion by separating and shifting the red, green, and blue color channels. It is commonly used to create retro VHS looks, sci-fi glitches, or subtle realistic lens imperfections.
How do you create chromatic aberration in After Effects without plugins?
Duplicate your footage into three layers, apply the Shift Channels effect to isolate the Red, Green, and Blue channels on separate layers, and set their blending modes to Screen or Add. Once isolated, simply offset the scale or position of individual channels to produce the color-fringing effect.
How can you add chromatic aberration faster than in After Effects?
Instead of manually stacking channels and adjusting blending modes in After Effects, you can use Glitchest at /app/ to apply RGB split effects in your browser. It processes your files locally with real-time controls—no software installation, uploads, or accounts required.