Effet Caméra Vidéosurveillance Sans Premiere | Gratuit
Recreating an authentic effet camera videosurveillance without Premiere doesn't require complex nested sequences or expensive third-party plugins. By combining scanlines, low-resolution pixelation, and monochrome tinting directly in your browser, you can achieve the stark feel of genuine security footage in moments. With Glitchest, you get full control over surveillance visual degradation without installing desktop editing suites or creating an account.
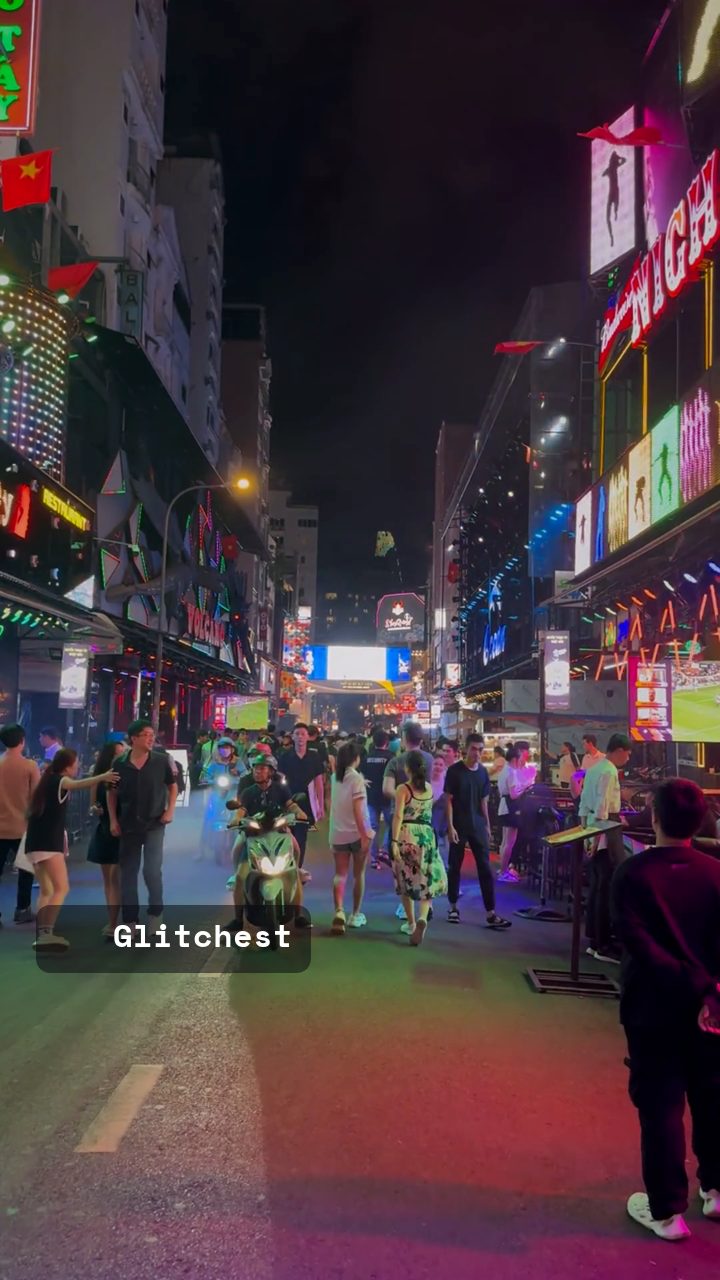 BEFORE
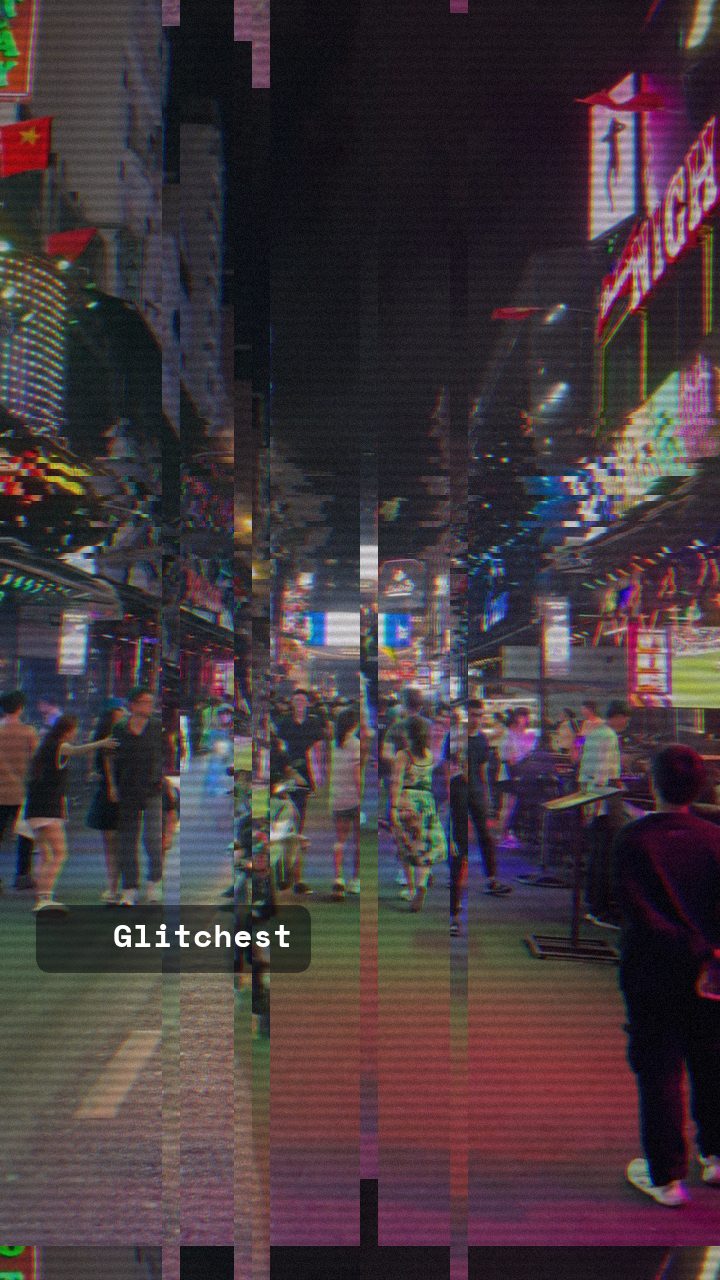 AFTER
AFTERKey Visual Elements of Surveillance Camera Footage
Real CCTV footage from security cameras, building monitors, and retro surveillance systems has distinct visual signatures. To achieve an authentic result, your edit should include several key elements:
- Low Resolution & Video Compression: Security systems heavily compress video to save storage space, resulting in blocky artifacts and soft focus.
- Scanlines & Noise: Interlaced feeds and analog cables introduce horizontal scanlines, grain, and static burst across the monitor screen.
- Desaturated or Tinted Colors: Most security cameras run in monochrome black-and-white, muted grayscale, or high-contrast night-vision green and cold blue tints.
- High Contrast & Bleeding Highlights: Overexposed light sources often blow out into harsh whites, while dark corners hide in deep shadow.
- Intermittent Signal Glitches: Frame skips, video noise rolls, and momentary sync loss happen frequently on real security feeds.
Step-by-Step: How to Make a CCTV Effect in Your Browser
You do not need heavy desktop editing software or paid plugins to recreate vintage security camera feeds. You can achieve the look directly in your web browser using Glitchest.
- Import Your Media into the Editor: Start by navigating to the editor. Drag and drop your target video or image file into the workspace. Because Glitchest processes all rendering locally in your browser using WebCodecs, your file loads instantly without uploading to any cloud server.
- Select a Security Base Preset: Under the Presets menu, choose a foundation look that fits your scene. The Signal Jam, Broken Monitor, or Dead Channel presets instantly apply signal degradation, noise, and scanline artifacts reminiscent of security control rooms.
- Apply CRT Scanlines and Grain: Adjust the noise and line-intensity sliders to simulate hardware monitor degradation. Adding subtle horizontal lines mimics old CRT security monitors. If you want a deeper look at monitor line effects, check out our guide to adding scanlines to video.
- Dial Back Color for a Security Camera Palette: Lower saturation to turn your footage into stark black-and-white, or adjust color balance to create a cold security monitor tint. You can also use the Time Machine dial to apply low-fidelity color compression and vintage video characteristics.
- Animate Intermittent Glitches using Effect Boxes: Real CCTV footage stays relatively stable until static bursts strike. Add effect boxes on the timeline below the preview to place your glitches in time. Keep any full-length effect low, then drop short boxes with little or no fade wherever you want static drops, video tearing, or signal hiccups so they snap on as hard events.
- Isolate Feeds with Rectangle Masking (Optional): If you want to simulate a multi-camera security monitor layout, use rectangle masking. Mask out specific sections of your video box to mimic a multi-feed security grid or split-screen monitor interface.
- Export Your CCTV Creation: Once your look is complete, export your video as a high-quality MP4 file via WebCodecs rendering. If you only need a static picture for thumbnail art, photo manipulation, or social posts, hit Save Frame to grab a full-resolution PNG image immediately.
Filming Tips for Better Security Camera Edits
Even the best video filter looks convincing only when paired with strategic shooting choices. Keep these production tips in mind when capturing footage for a surveillance scene:
- Mount High Angles: Place your camera high up in the corner of a room, looking down at subjects. CCTV cameras are almost always ceiling-mounted or attached to exterior walls.
- Keep the Camera Wide: Avoid telephoto lenses. Most security cameras use wide-angle focal lengths to capture as much room area as possible.
- Limit Camera Movement: True security feeds are locked down on fixed brackets or rotate on mechanical PTZ (pan-tilt-zoom) motors. Avoid handheld camera shake.
Combining CCTV Visuals with Found Footage Horror
Surveillance camera effects are a core storytelling device in found footage, thriller, and horror genres. Blending security noise with dark atmospheric lighting builds instant suspense. For creators looking to craft unsettling atmospheric stories, explore our detailed guide on creating analog horror clips online.
How to Get the CCTV Effect Without Premiere Pro or DaVinci Resolve
Recreating an authentic cctv effect in DaVinci Resolve or a cctv effect in Premiere Pro typically requires stacking multiple adjustment layers, third-party grain plugins, and complex color-grading node trees. If you need a fast security camera look without launching a heavy desktop suite or rendering massive project files, you can build the entire look inside the Glitchest browser editor.
Instead of manually keyframing distortion maps in Premiere or DaVinci, use these editor controls to achieve the surveillance effect in seconds:
- Quick Starting Point: Select preset chips to immediately apply baseline video degradation and vintage color grading.
- Precise 0-100 Knobs: Dial in custom scanlines, pixelation, color desaturation, and static grain to match infrared night vision or low-bitrate security feeds.
- Timeline Effect Boxes: Drag effect boxes along the timeline to target specific clips, adjusting the fade handles on either side to smoothly blend signal dropouts or camera glitches.
Because processing runs entirely on your local machine, nothing uploads to external servers. Once your footage has the right security feed texture, click Save Frame (PNG) for still captures or hit Export (MP4) to render your final CCTV video clip instantly.
Recreating the Effet Caméra Vidéosurveillance Look Without Premiere
In traditional desktop editors like Premiere Pro, building a convincing security camera feed involves stacking adjustment layers, dialing in Lumetri color curves, and keyframing multiple noise generators. In Glitchest, you can assemble the entire look quickly using targeted modules in your browser without uploading your raw files to a server.
To build your custom surveillance feed in the editor, load your clip and apply your styling chain using preset chips and manual parameter controls:
- Color Desaturation: Drop the color saturation with the 0-100 knobs or apply a monochrome tint preset chip to mimic low-bandwidth security sensors.
- Scanlines and Pixelation: Introduce horizontal raster lines and reduce visual sharpness to recreate vintage CRT surveillance monitors and cheap CMOS lenses.
- Sensor Noise and Glitch: Add digital noise and adjust the timeline effect boxes, dragging the fade handles to smoothly introduce interference spikes or static dropouts.
Preview your playback in real time to verify the timing of your surveillance artifacts. When you are satisfied with the clip, click Export (MP4) to render your processed video, or select Save Frame (PNG) to capture high-resolution security camera stills for found-footage graphics.
The exact settings
Start from the Bad Tracking preset, then set:
| Vertical Shift | 24 |
| RGB Split | 30 |
| Grayscale | 22 |
| Noise | 45 |
| Scanlines | 60 |
| Bad VHS Pause | 42 |
| Vertical Roll (TV) | 44 |
Everything else stays at its default — tweak it, then copy your own look as JSON or a link from inside the editor to share it.
Try it now — add this look to your own clip, free and in your browser.
Open the editor →FAQ
Do I need to upload my video to a server to add a CCTV effect?
No, Glitchest processes all video rendering entirely inside your web browser using WebCodecs. Your video files remain 100% private and never leave your device.
Can I export CCTV effect stills as image files instead of video?
Yes, you can pause at any frame in the editor and click Save Frame to export a crisp PNG image immediately.
What preset is best for starting a CCTV or security camera look?
Presets like Signal Jam, Dead Channel, or Broken Monitor provide the perfect noisy, degraded foundation for vintage security monitor edits.
How do I create a CCTV effect in DaVinci Resolve?
In DaVinci Resolve, you can create a CCTV look by adjusting color grading to a monochromatic or greenish tint, lowering the timeline frame rate, and layering scanline and timecode overlays in the Fusion tab. For a faster alternative without manual node setups, you can apply a instant CCTV filter directly in your browser using Glitchest at /app/.
What is a CCTV camera effect?
A CCTV camera effect simulates the look of real security footage using features like timestamp overlays, scanlines, digital noise, heavy contrast, and a reduced frame rate. You can recreate this security camera aesthetic on any video or photo using the free Glitchest editor.
How can I add a CCTV effect in Adobe Premiere Pro?
In Premiere Pro, you can stack Lumetri Color adjustments, the Posterize Time effect to reduce frame rates, and graphic overlays for timestamps and scanlines. If you want a quick option without manual effect stacking, you can upload your media to Glitchest at /app/ for immediate in-browser processing.