How to Make a Rapid Channel-Swap Glitch Online
A rapid channel-swap glitch creates high-energy visual friction by violently flipping color balances, inverting chromatic phases, and electrifying high-contrast edges across individual frames.
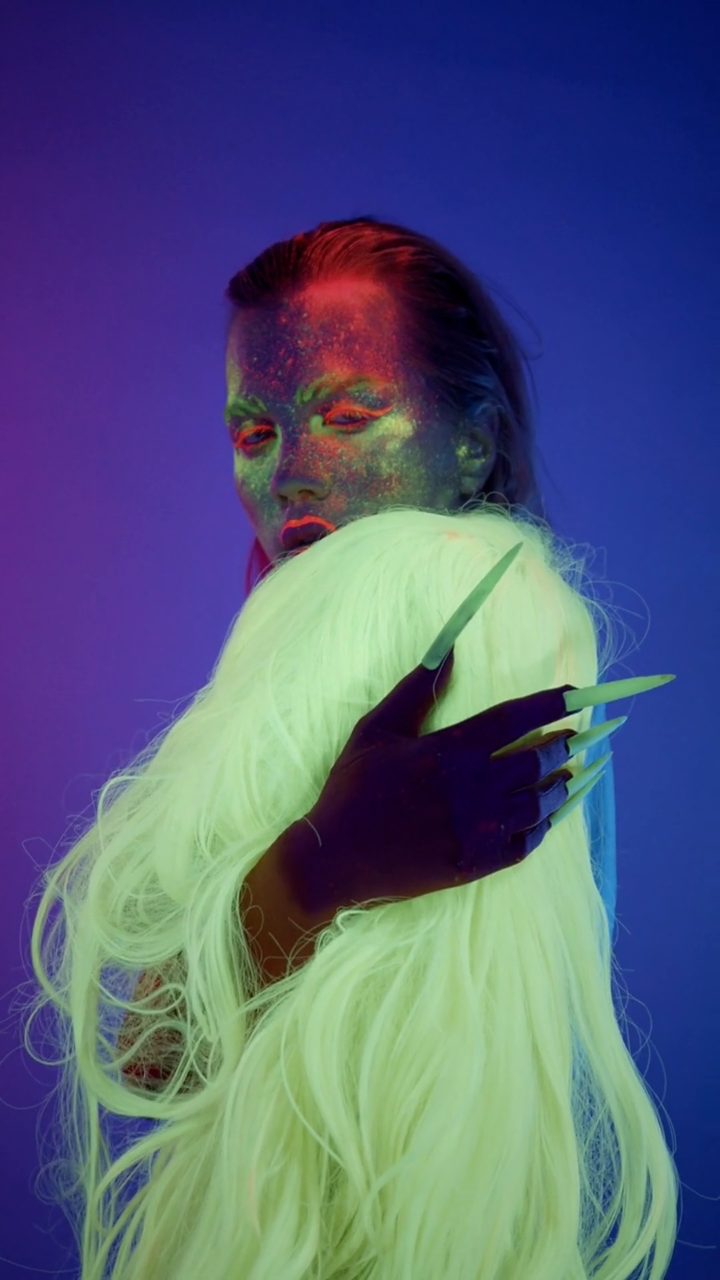 BEFORE
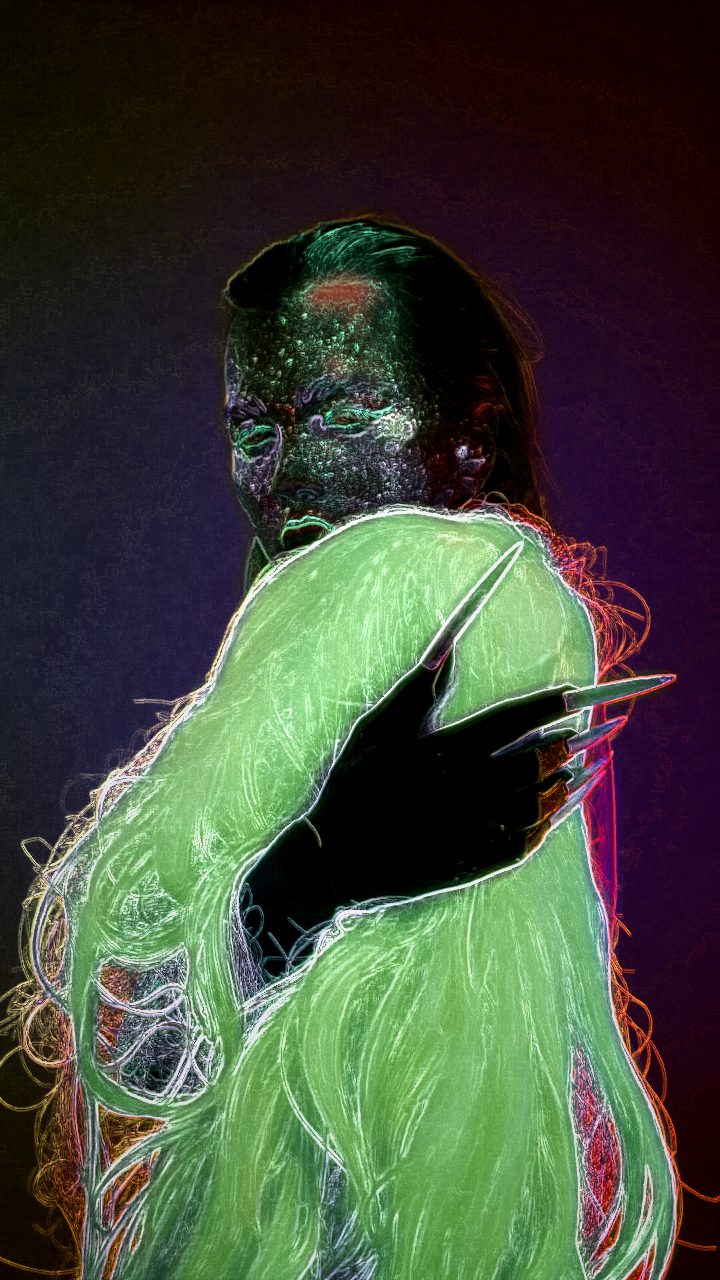 AFTER
AFTERThe Two Paths: Manual Channel Separation vs. Preset Stacking
In traditional non-linear editors like Adobe Premiere Pro or After Effects, building a synchronized channel-swap flash requires duplicating your footage across three video tracks, isolating red, green, and blue values with the Shift Channels effect, changing blend modes to Screen, and keyframing position or hue parameters frame by frame. While this approach gives absolute control over individual pixel offsets, it demands considerable setup time, tedious timeline management, and lengthy export caching for what amounts to a split-second visual accent.
Using browser-based effect boxes streamlines this entire process. Instead of managing nested multi-track composites, you can jump straight into the editor, drop a single effect box over your cut point, and shape how color registers interact in real time. Rather than dealing with complex timeline curves, you adjust physical effect blocks across stacked lanes to trigger punchy, rhythm-locked color disruptions instantly.
Why Neon Outline Powers the Channel Chaos Look
While many editors reach for a standard RGB split channel shift to displace colors laterally, a true chaotic channel swap needs frequency inversion and edge luminescence. This is why the Neon Outline preset serves as the ideal engine for this aesthetic.
Neon Outline combines radical phase rotation with edge detection, pulling subject contours away from background tones and painting them in electric hues. Instead of merely smearing colors sideways, it actively recalibrates luminance boundaries, making every quick flash look like an overloaded video processor struggling to parse color data.
Once you load the preset, fine-tune the vibe by adjusting specific parameters:
- Hue Shift: Rotate this knob to alter which primary colors swap places during the glitch. Sweeping this value shifts standard greens into ultraviolet or blues into caustic yellows.
- Edge Outline: Increase this slider to sharpen boundary lines for an intense cyberpunk look, or back it off if you want a softer, full-frame color wash.
- Glow / Bloom: Push this control to let the shifted channels bleed across adjacent shadows, simulating blown-out CRT phosphor flare.
- Contrast and Color Boost: Dial these up together to ensure your swapped channels retain punchy saturation rather than washing out into gray noise.
Step-by-Step: Triggering Rapid Glitch Bursts on Beat Hits
- Load your media: Open Glitchest and bring in your source video or still image. Processing runs entirely in your local browser with zero cloud uploads or account requirements.
- Apply the starting look: Select the Neon Outline preset from the library to establish your glowing, swapped-channel baseline.
- Place an effect box on the timeline: Drag an effect box over the exact section of your clip where the transition or beat hit occurs. Resize the box so it only covers a few frames (a short box creates an abrupt, hard-hitting glitch spike).
- Configure fade timing: Set both the fade-in and fade-out parameters to zero for an instantaneous, percussive snap, or add a slight fade-out if you want the color distortion to dissolve smoothly back into clean footage.
- Layer multiple effect lanes: For an unpredictable, syncopated rhythm, place alternating effect boxes across multiple lanes with contrasting Hue Shift settings. This makes the clip rapidly cycle through distinct color palettes on every kick or snare. If you want to push the look further into analog decay, compare this technique with a glitchcore RGB split and pixel sort edit.
- Export the render: Click Save Frame to grab an uncompressed PNG still, or hit Export Video to encode an MP4 locally via WebCodecs.
When to Use Subtle Shifts vs. Full Chaotic Inversions
Choosing between a gentle chromatic offset and an aggressive channel overhaul depends on your edit's pacing. For subtle tension in music videos or ambient reels, use larger effect boxes with gentle fades and dialed-down Edge Outline values. When cutting fast-paced gaming montages, title sequences, or heavy audio drops, stack ultra-short boxes with elevated Glow and high Color Boost to deliver maximum visual impact without muddying your core composition.
The exact settings
Start from the Neon Outline preset, then set:
| Hue Shift | 44 |
| Color Boost | 54 |
| Contrast | 62 |
| Glow / Bloom | 40 |
| Edge Outline | 76 |
Everything else stays at its default — tweak it, then copy your own look as JSON or a link from inside the editor to share it.
Try it now — add this look to your own clip, free and in your browser.
Open the editor →FAQ
Why use the Neon Outline preset for a channel-swap look instead of basic RGB split?
Neon Outline isolates high-contrast boundaries while shifting underlying color frequencies, giving your channel swaps radiant edge separation rather than a flat chromatic blur.
How do I make the channel swap flash rapidly on a specific beat?
Drop a short effect box onto the timeline right over the beat hit and set zero fade duration so the color mutation snaps in and out instantly across a few frames.
Will stacking multiple channel-swap effect boxes cause browser lag?
No, Glitchest processes WebGL shaders and exports MP4 video locally via WebCodecs without server roundtrips, allowing multiple layered effect boxes to render smoothly.