CRT Glow Effect in Premiere Pro (And Free Shortcut)
Building an authentic Premiere Pro CRT effect usually requires stacking multiple glow duplicates, Lumetri color passes, and blending modes. While manual setups in Premiere offer granular control, configuring all those adjustment layers takes time. For an instant retro finish, you can also generate realistic CRT bloom directly in your browser using Glitchest.
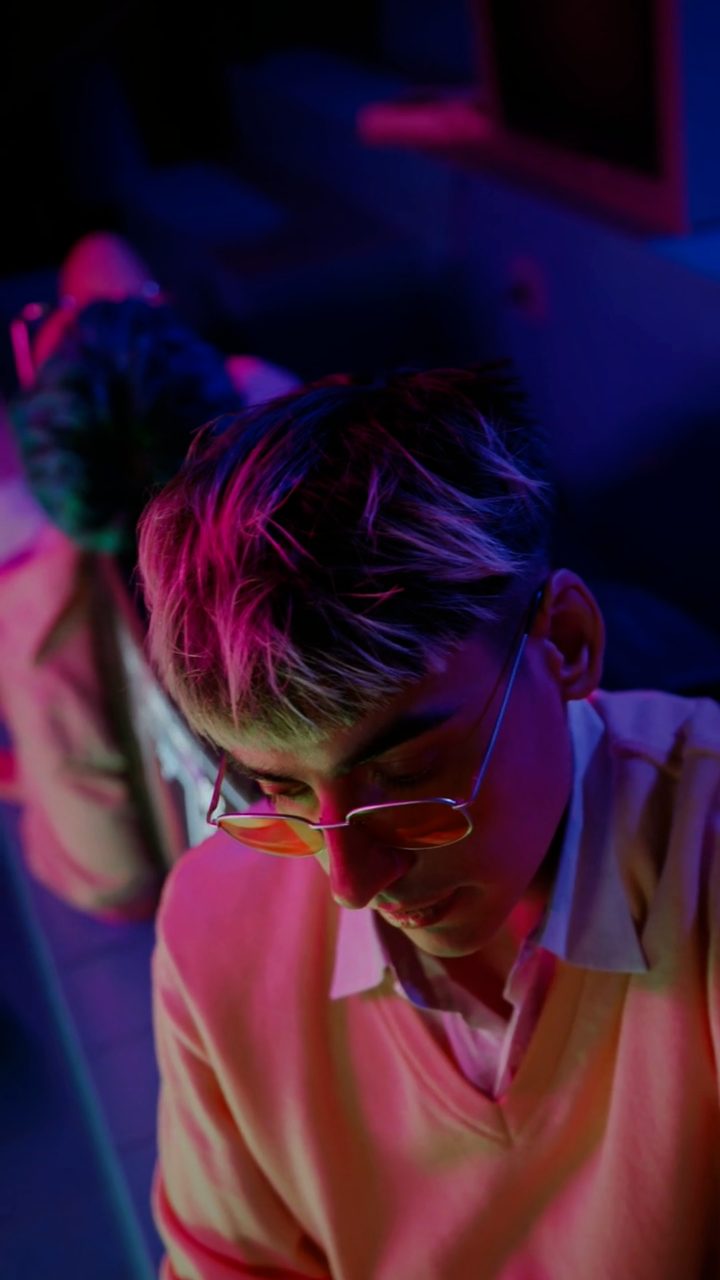 BEFORE
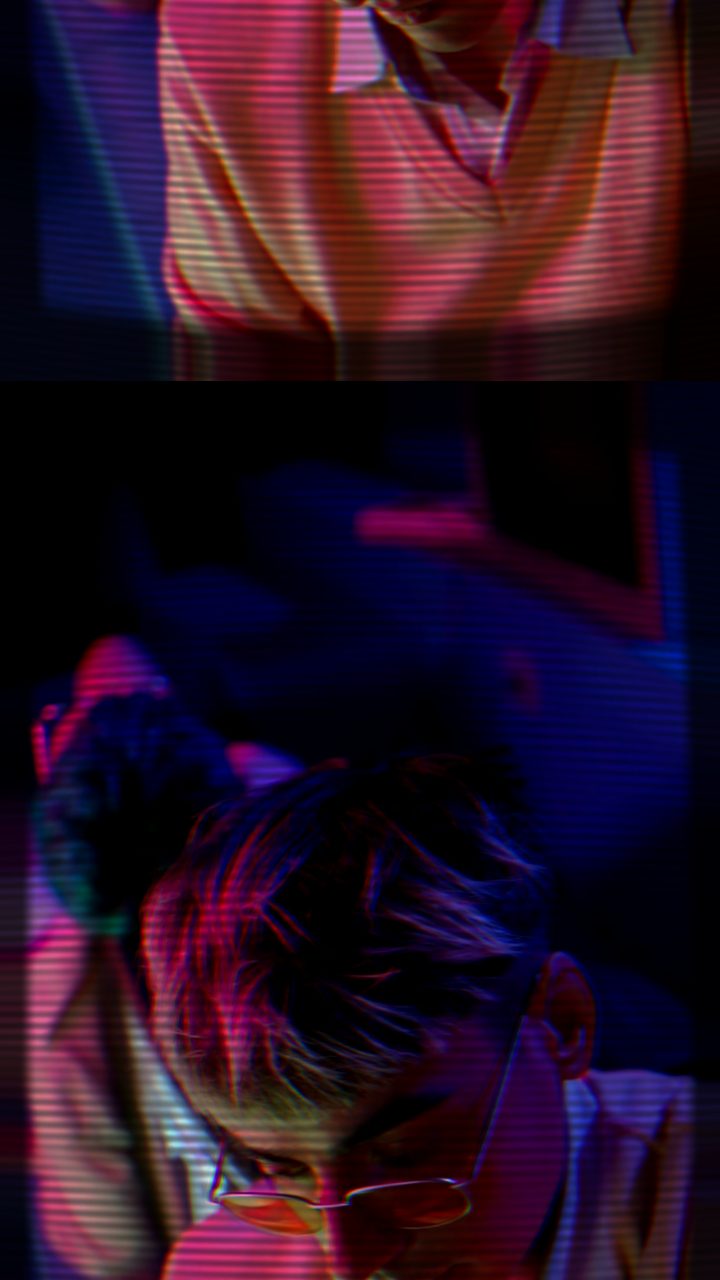 AFTER
AFTERHow to Build a CRT Glow Effect in Adobe Premiere Pro
Adobe Premiere Pro gives editors complete granular control over every aspect of their frame, but because there is no single native "CRT Glow" filter, you must build the look using stacked native effects and track blending.
Step 1: Isolate the Highlights for Phosphor Bloom
Real cathode ray tubes emit a distinct optical bleed where intense light scatters across the glass faceplate. To recreate this in Premiere:
- Hold Alt/Option and drag your video clip up to the track above to create a duplicate.
- Select the upper clip and navigate to the Effect Controls panel. Set the Blend Mode to Screen or Linear Dodge (Add).
- Apply the Levels or Lumetri Color effect to the upper clip and crush the shadows so only the brightest white and neon areas remain visible.
- Apply Gaussian Blur (or Directional Blur) to the upper clip. Increase the blur radius to create a soft, radiant bloom around your highlights.
Step 2: Add Screen Curvature and Color Fringing
A CRT display features curved heavy glass and misaligned electron guns that split color along high-contrast borders:
- Create a new Adjustment Layer across your sequence.
- Add the Lens Distortion effect (under Distort) and increase the Curvature value slightly to bend the edges of your image outward like a convex bubble.
- Add VR Chromatic Aberration or separate color channels to introduce subtle red-cyan or green-magenta fringing along the perimeter. If you need dedicated chromatic aberration workflows, check out our guide on chromatic aberration in Premiere Pro.
Step 3: Generate Scanlines
To finish the look in Premiere, drop the Venetian Blinds effect onto another adjustment layer above your blur track. Set the Direction to 90 degrees, increase the Transition Completion slightly, and lower the layer's opacity to etch horizontal scan raster lines over the bloomed frame.
While this multi-layer structure produces great results, setting up adjustment layers, blending modes, and duplicate tracks across multiple cuts takes significant timeline real estate and rendering overhead.
The Free In-Browser Shortcut: One-Click CRT Glow in Glitchest
If you need the authentic luminance, curvature, and tube decay of an old television without nesting half a dozen adjustment layers, you can use the editor in Glitchest completely free in your browser. There is no software installation, no account creation, and zero video uploading—your footage processes locally on your machine via hardware acceleration.
- Import your media: Open the editor and drag your video clip or still image directly onto the workspace.
- Load the CRT TV preset: In the presets bar, click CRT TV. This preset instantly establishes the phosphor bloom, glass geometry, line rasterization, and subtle electronic flicker of a classic television.
- Nudge the knobs to match your scene:
- CRT Curve + Glow: Push this slider higher if you want blown-out, dreamlike highlight blooming, or back it off for a sharper broadcast monitor aesthetic.
- Scanlines: Adjust this to set the physical line density of the virtual screen. For more details on tuning horizontal raster patterns, explore our guide on how to add CRT scanlines to video.
- RGB Split: Dial in edge separation to emulate misaligned shadow masks or miscalibrated electron guns.
- Flicker: Introduce subtle 60Hz power cycle fluctuations for an authentic low-frequency cathode pulse.
- Arrange effect boxes on the timeline: Glitchest uses a modular effect-box timeline. Drag your CRT effect box to cover the entire clip, set the box's fade-in and fade-out to blend the effect smoothly into clean footage, or stack short boxes across multiple lanes to create intermittent glitch hits and interference spikes.
- Export instantly: Click Export Video to render an MP4 directly via WebCodecs, or click Save Frame to pull a lossless PNG still.
When to Use Premiere vs. the Glitchest Shortcut
Use Premiere Pro when you are in the middle of a complex multi-cam assembly or need keyframed motion graphic overlays that link directly to After Effects compositions. Use Glitchest when you want immediate, tactile feedback, instant phosphor halation, and organic analog screen curvature without bogging down your primary NLE timeline.
Building a Complete Premiere CRT Effect Without Plugin Stacks
Achieving a convincing premiere pro crt effect natively often demands paid third-party plugins or a tangled sequence of adjustment layers covering scanlines, RGB splits, and barrel distortion. When you need the classic aesthetic of an old-school cathode ray monitor quickly, preparing your clips in the Glitchest studio provides a seamless companion workflow for Premiere editors.
Because processing runs entirely in your browser, your media stays private on your machine with nothing uploaded to external servers. To prep your clip for a Premiere timeline:
- Drop your video or still image into the editor at Glitchest without needing an account.
- Select the CRT preset chips to instantly apply phosphor glow, raster lines, and screen curvature.
- Fine-tune the look with the 0-100 knobs to dial back intensity, or use the timeline effect boxes with fade handles to ease the distortion in and out.
- Hit Export (MP4) for video clips or Save Frame (PNG) for stills, then drag the rendered media straight back into Premiere Pro.
This hybrid approach delivers the tactile grit of genuine retro hardware without bogging down your Premiere playback engine with heavy multi-track rendering.
The exact settings
Start from the CRT TV preset, then set:
| RGB Split | 18 |
| Brightness | 53 |
| Contrast | 58 |
| Scanlines | 40 |
| Flicker | 10 |
| CRT Curve + Glow | 74 |
| Vertical Roll (TV) | 6 |
Everything else stays at its default — tweak it, then copy your own look as JSON or a link from inside the editor to share it.
Try it now — add this look to your own clip, free and in your browser.
Open the editor →FAQ
How do you create a CRT glow in Premiere Pro natively?
Duplicate your video layer, set its blend mode to Screen or Linear Dodge, apply a luma threshold to isolate the highlights, and add a Gaussian Blur with a slight tint to simulate blooming cathode phosphors.
Why does native CRT styling take multiple adjustment layers in Premiere?
Premiere Pro separates distortion, color channel fringing, bloom, and scanlines across distinct effects like Lens Distortion, VR Digital Glitch, Gaussian Blur, and Venetian Blinds, requiring layered stacking to achieve one coherent look.
Can I export transparent or framed CRT graphics from Glitchest?
Yes, you can drop any graphic, logo, or video into Glitchest, apply the CRT look, and export either a high-resolution MP4 video or a pristine PNG still via Save Frame.
How do you create a CRT effect in Premiere Pro?
In Premiere Pro, you can simulate a CRT monitor by combining effects like Lens Distortion for barrel curvature, color grading for high contrast, and blending custom scanline textures over your footage. If you want a faster alternative without manual layer stacking, you can generate CRT styles directly in your browser using Glitchest at /app/.
Does Premiere Pro have a native CRT effect?
Premiere Pro does not include a single dedicated CRT effect, so you must composite multiple native effects like Gaussian blur, VR Digital Glitch, and RGB split manually or install third-party plugins. Alternatively, you can process your video through Glitchest at /app/ to apply authentic CRT phosphor and scanline effects instantly for free.
How do I add a retro CRT glow to my footage in Premiere?
To achieve a CRT-style glow in Premiere Pro, duplicate your footage, apply a heavy Gaussian Blur along with Lumetri Color to crush the shadows, and set the top track's blend mode to Screen or Linear Dodge. For an even quicker workflow, you can add customizable CRT glow and scanlines online at Glitchest (/app/) without needing an account or extra software.